Making Sense of the New Block Editor
Change can be difficult to deal with, even when it’s for the good. The WordPress Block Editor (which came out of the Gutenberg project) is for-sure better than the WordPress Classic Editor plugin but many of us are still struggling to make the switch.
In fact, the Classic Editor plugin still ranks in the top five most used plugins, with over five million active downloads. It seems that many of you out there are resisting the tides of change and holding on for dear life.
But really, it all comes down to familiarity. Even now, a few years after the Block Editor release, we’re simply so used to the Classic Editor – quirks, limitations, and all – that learning how to use the new Block Editor seems like a chore.
The good news is that it’s really not that bad and the learning curve is short. Not only is it much easier to use, but the Block Editor offers much better functionality than its older counterpart. It even got us questioning whether page builders are still worth it!
Block Editor vs. Classic Editor: What’s the Difference?
The Block Editor is as different from the Classic Editor as two editors can be. The Classic Editor is organized along similar lines to a Word or Google Doc. You have a small box to enter the title and then a large one for all your content.
The Block Editor, on the other hand, is made up of blocks (which is where it gets its name). These blocks represent content elements that you can add as you wish. They can be paragraphs, images, videos, etc. And there are many plugins that will provide access to even more blocks.
This block approach makes the Block Editor much more powerful than its older alternative. You can more easily add different types of content to your posts or pages, without having to use a separate plugin like with the Classic Editor. Tables, graphs, columns, and rows are now much easier to incorporate.
Best of all, these new features don’t come at the expense of the old. Everything you were able to do in the Classic Editor can also be done in the Block Editor.
The purpose of this post is to ease you into the Block Editor. There’s so much that is possible, with plugins, dynamic visual elements, themes, and more, but it’s all based on a very simple foundation. By taking a look at the basic makeup of the editor and dipping your toes in the water, we hope you’ll feel more confident to uninstall the Classic Editor plugin and embrace the future.
Level 1: An Introduction to the Block Editor
To get you familiar with the basics, we’ll walk you through how to use the Block Editor. Overall, the block approach is intuitive and easy to use and much of the difficulty people have is just cosmetic.
Say, for example, you want to create a new blog post or page in the editor. It begins in exactly the same way as the Classic Editor.
Step 1: Launching the Editor
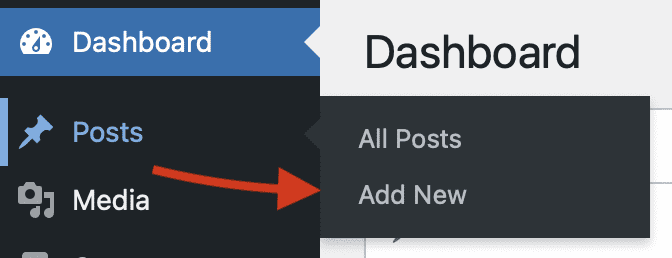
You click on Posts or Pages and select “Add New”. From there, you will add the title where prompted, just like you did with the Classic Editor.
Step 2: Adding Content
The next block below the title is, by default, a paragraph block. If you start writing now, it’s the same as the Classic Editor – until you want to add a new element.

Step 3: Finding a New Element
Say you write an introduction in a blog post and want to then include a H2 header. In the Classic Editor, you would select “H2” from the menu above and continue on your way. With Guenberg, however, you need to add a separate block, which will be the H2 block.
To do this, you click on the “Add New Block” button, which is a plus sign in a box. You can find it at the top of the editor beside the WordPress symbol or to the right of the block itself.

Step 4: Selecting the Block
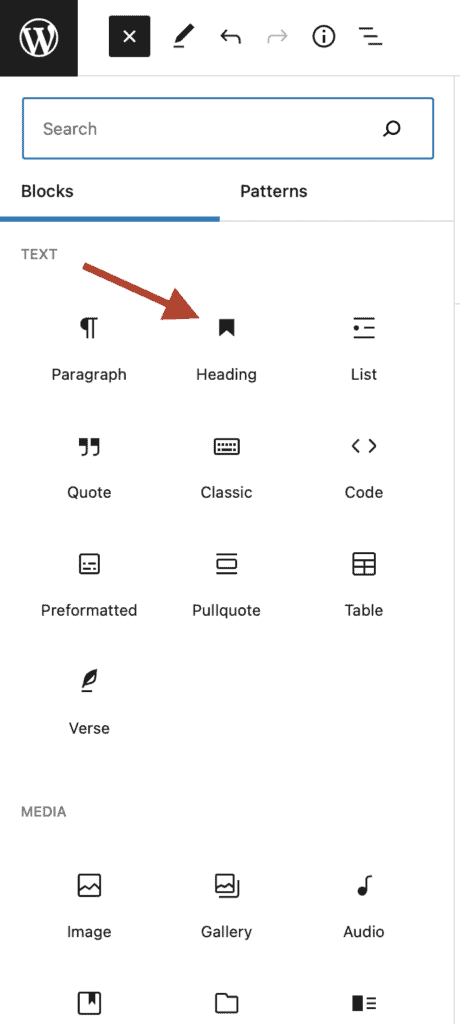
Once you click it, you’ll see the options you have in front of you. You can browse the categories or use the text box to search whatever you want. For our purposes, to add a H2 header, you click on “Heading” and select the one you want. That will add the block to the editor.
These four simple steps are how you use the editor at the most basic level. Everything you want to do – all the complexity that is possible with WordPress – is based on this simple workflow.
Top Tip: To speed up the process, you can add blocks using shortcuts. Simply type in / and then the block you want to add.
Level 2: Delving Into Blocks
Not all blocks are created equal. When you add an element (or block) to your editor, you will see a toolbar appear above it. The options you have in this toolbar will change depending on the specific block you choose.
Basic Block Elements
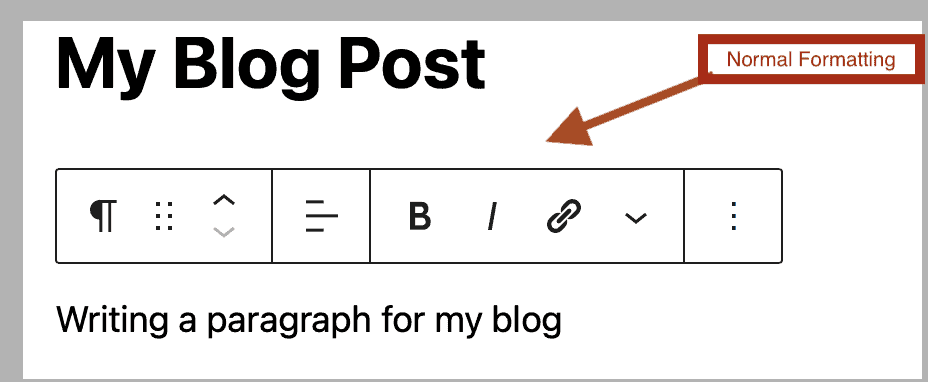
Take the normal paragraph block as an example, which is probably the most basic block you can use. When you add it, you will see a toolbar for all the formatting options you’d expect, such as bold, italic, linking, etc.
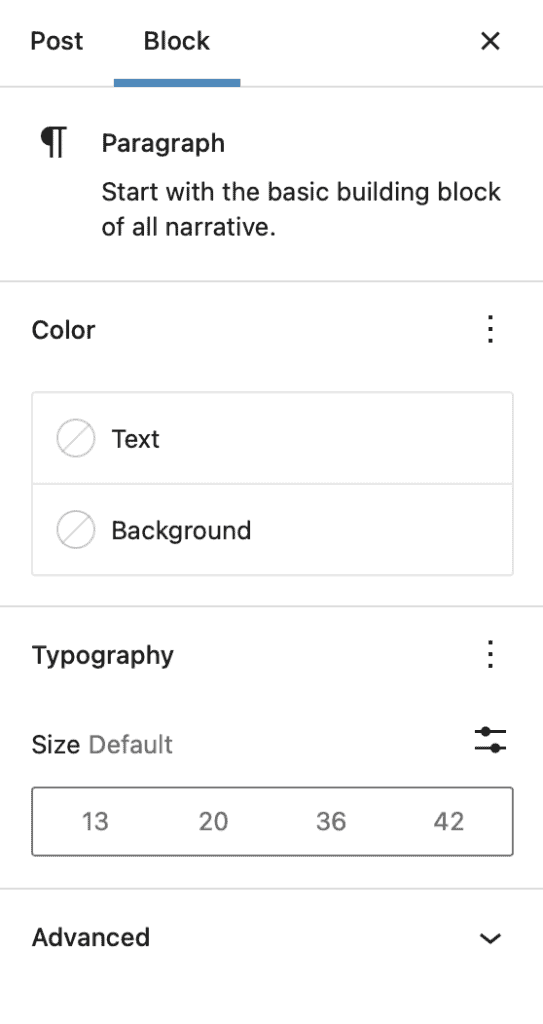
Alongside the toolbar, you also have the block settings. These appear on the right side of your screen when you click on the block. Here, you can adjust the font size, line height, spacing, background color, and more.
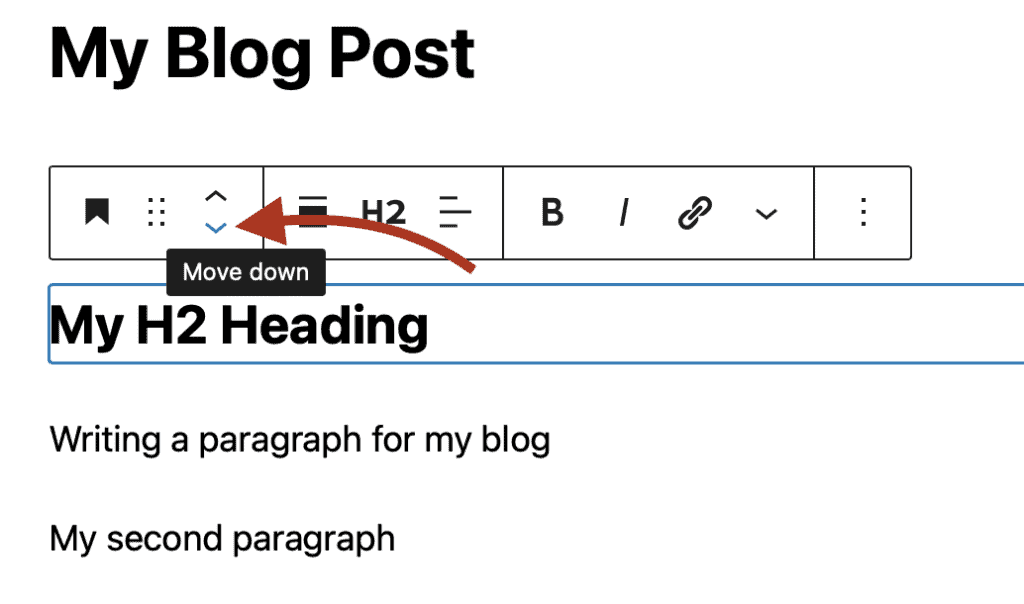
Finally, with each block you can click and drag to change where they appear on the editor. If you decide your H2 header would be better a little further down, select the drag option in the toolbar and move it to where you want!
Getting Organized
Flexibility is touted as the Block Editor’s main advantage. And a key difference between the new editor and the classic one is how easy it is to organize where the elements appear on the page.
With the Classic Editor, you’d need a plugin for anything remotely complex (even if it’s just adding columns). With the Block Editor, however, it’s built into the design. By using the SHIFT key, you can select multiple columns and then organize them into a group or a column using the block-type option in the toolbar.
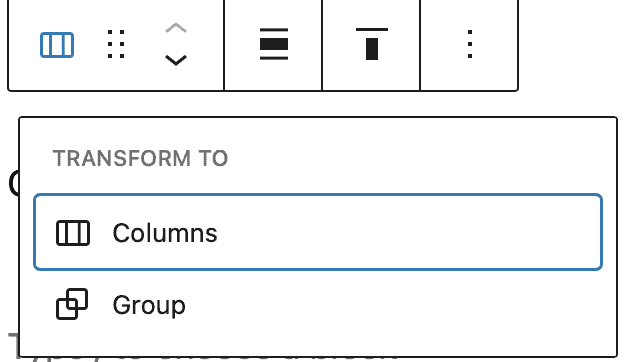
Once you’ve done this, you can change their alignment, spacing, color, or apply other changes to the unit. With columns, you can have up to six side by side, giving you incredible control over the layout of the page.
Saving Blocks
If you have a block that you particularly like or think will be useful in the future, you can save them for later. As with anything in Block Editor, it’s very easy to do.
Click on the menu button that looks like three dots in the toolbar. You’ll see an option to add to reusable blocks and that’s it! Just add a name so you remember what it is.
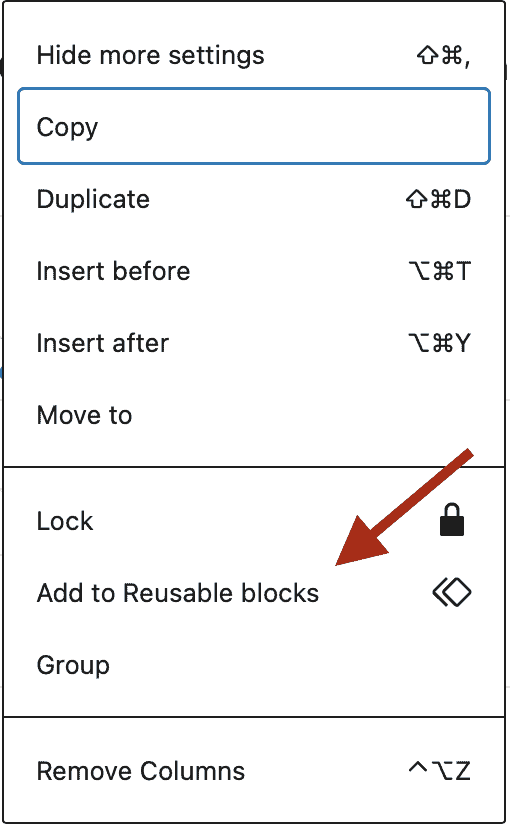
When you’re on a new page and you need to add it in again, you will see the “Add Block” button on the post or page edit screen. It will be saved under the “Reusable” tab. Once you click on that tab, either scroll down or search using its name.
Embracing the Block Editor
There’s no doubt that the Block Editor is capable of incredible complexity but at its heart is a simple, easy-to-use tool that anyone can get their head around. Just open up a new post or page and begin playing around. You can always delete the draft later and, if you’re really worried about breaking something, it’s easy to spin up a staging site!
If you’re still using the Classic Editor plugin, it’s simply time to let it go and embrace the future. Not only does the new Block Editor offer much more design flexibility, but it really is easier to use than its predecessor.
Give it a go and give it time. We’re confident you’ll see its value soon. And if not, our team at Pixel Jar can manage and maintain your website for you. Feel free to get in touch if you want more information.
